
Tips for Excel, Word, PowerPoint and Other Applications
Introduction to Forms Tools
Why It Matters To You
Forms Tools provide a nice set of option for controlling inputs and providing some controlled interactivity. Like data validation, Forms Tools allow you to provide interactivity within a specified range of inputs. Unlike data validation, you can also use Forms Tools to trigger macros and you have a wider toolbox of controls with which to work.
How To ...
This is an introduction to Forms Tools, which are preformatted buttons, spinners, drop downs, etc, which help provide a specified range of input options to a user. This article is really only meant to show you where Forms Tools are located, how to select one, and the basics of setting them up. A future tip will discuss the generation of reference values and how to use them. I've also included a sample file so that you can follow along.
Go to Main Menu: View: Toolbars and then select Forms.
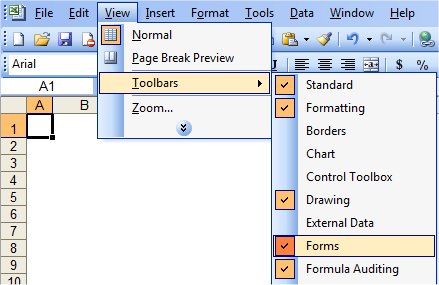
You should now see the Forms Toolbar. If you hold your mouse cursor over any one of the buttons, it will pop up the name of the button (e.g., button, check box, radio button, etc). These correspond to the examples below.

To create a Forms Tool, click on one of the toolbar buttons. Your mouse cursor should turn into to crosshair. This crosshair lets you draw your Forms Tool anywhere on your Excel worksheet. Once drawn, you can right-click on it to show the drag handles, which allow you to move or resize the Forms Tool. Just one note of caution, Forms Tools are discrete objects, not cell contents, so their dimensions can get altered when you insert or delete columns and rows. This happens more commonly when a Tool spans two columns and you insert a column.
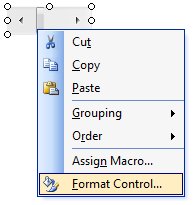
To set up the control parameters, right-click on any of the Forms Tools and select Format Control (see example). You'll have to play around this a bit, since I won't be specifically addressing each tool in this Tip.
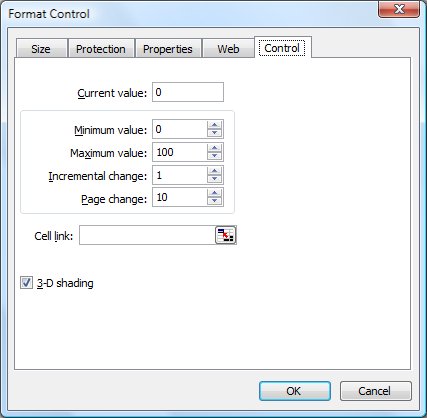
The Format Control box is where you will set up the Forms Tool's values and cell link. What is the cell link? For Tools which generate a value (e.g., combo boxes, spinners), the Cell Link is where the output value will show up. This is an important concept because if you're not careful, it's easy to loose track of which output is linked to which Tool. One trick I use is to specify the output cell to be the cell directly under the Form Tool, so that I know where every value is.
A key concept to understand is that Forms Tools output a numerical or logical values and not text values. For example, if I have a list of presidents and the first one in the list is Washington, Data Validation will return the value "Washington", where as a Combo Box will return the value "1". This has significant implications on where and how the output values get used in various formulas you might want to write.
And now, ... onto the Forms Tools
Open the sample file and we'll walk through a couple of examples.
Buttons
Buttons provide a trigger for macros. In the property box, you specify which macro to run upon activation of the button. If you don't use macros, this may not be that interesting.
Check Boxes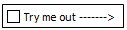
A check box returns a TRUE or FALSE result to the target cell. This makes it useful in logical math, where you can use the check box to turn values on and off. In the properties, you can select whether the checked value equals TRUE or FALSE.
The example shows a simple check both with a simple IF statement, which displays one of two messages based on the TRUE or FALSE result.
Radio Buttons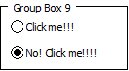
Radio buttons look like check boxes, but are quite different. First, radio buttons, also known as option buttons, need to be grouped. Click on the group button and describe a group box that completely surrounds the radio buttons you want to include. Within a group, only one radio button can be checked at any given time. Click on one, and any other checked button will become unchecked. A group of radio buttons generates a value in the target cell that equals the order in which a radio button was added to the group, so you have to be careful about how you add and organize your radio buttons.
The example shows a simple group of two radio buttons and the output, which could be used to drive column or row selection in a VLOOKUP or INDEX function, for example.
Combo (Dropdown) Boxes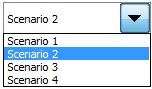
Combo boxes look almost like data validation cells, but act very differently. If you recall, data validation cells are linked to a list of values that must be on the same worksheet or a list of manually-entered values and actually returns the value. A combo box can take its source list from anywhere in the workbook, which means that you can set up a control list anywhere in the workbook and reference the same list on multiple sheets, which is nice from an editing and control standpoint. Unlike data validation, a combo box returns a value to the target cell that is equivalent to the selected values place in the list. So, in a list of 8 items, if I choose the 5th item on the list, the value generated will be 5. This has some implications on how we use the selection in other formulas.
There are two examples here. One simply shows you the output value based on your selection. The second example uses the output value to drive an INDEX nested within a CONCATENATE to deliver a message.
List Boxes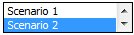
A list box acts just like a combo box, but instead of a drop down, the entire list is shown. This is probably best used for smaller lists, otherwise it can take up quite a bit of space. On the plus side, your user can instantly see all of the options available to them.
This example is the list box analog to the first combo box example and only serves to illustrate the difference between the two.
Scroll Bars
Scrollbars generate a whole number from x to y in the target cell. The values are actually limited to 0 and 30000. There are a couple of key things to note. First, you can't return a negative number and secondly you can't generate fractional numbers. If you want either of these results, you have to perform math operations on the target cell, which you can see in the example. One trick that I use is to hide the value under the scroll bar, which also ensures that I'll always know where it is.
One of the great benefits of a scrollbar is that you can grab the slider with your mouse and move it back and forth to dynamically change the target cell and therefore any formulas linked to it. For finer control, you can always click on the arrows. For a bit of fun, create a chart and tie some of the chart inputs to a slider and play around with it a little. This adds some nice interactivity to charts and graphs.
Example #1 is a simple scroll bar that is set up to return values from 0 to 100. Simple enough.
Example #2 simply transforms the scroll bar value into a percentage by dividing the raw value by 100, like this: =D43/100
Example #3 is a little more complex. I'm using my scroll bar to return a range of +/-20% Huh? I thought you couldn't generate negative numbers. The way you do this is to set a range of 0 - 40 in the Format Control, then subtract 20 from the raw value to transform the range of 0 - 40 into -20 - 20. You can then divide the entire value by 100 to generate a percentage. The formula looks like this: =(D46-20)/100
Example #4 is even more complicated. I'll describe what it does, but let you figure it out. I have a scroll bar that is set to return raw values between 0 and 100. However, I've tied it to a combo box (#2) to change the range from +/-100% to +/-10%. You can do some pretty cool stuff with sliders.
Spinners
Spinners act just like scrollbars except they are vertically oriented and don't have a slider bar. Aesthetically, I think scrollbars look better than spinners.
The spinner example is set up like the first scroll bar example and just serves to illustrate the difference between the two tools.
I hope this was helpful.
Notes
| Last updated | 4/29/08 |
| Application Version | Excel 2003 |
| Author | Michael Kan |
| Pre-requisites | None |
| Related Tips | Data Validation |